Showing posts with label Tasty. Show all posts

Friday, August 1, 2014

Elevated veggie patch and garden goodness

I have been meaning to post a garden update for some time, and since this baby shows no sign of arriving (currently 3 days overdue), I now have opportunity to do so!

After such a positive start to the seedlings we began indoors in April, most of them seemed to grow too tall, too fast, and became weak and scraggly, flopping over into dead, or... mostly-dead status. Some of them survived being transplanted, but most of our success is from direct-seeding into these beautiful elevated gardens that Mark built in late spring. The structures are made from cedar, and the outer "wabi-sabi" boards were scrounged from around our neighbourhood on garbage night. Hooray for upcycling and saving things from landfill!

He built them for a number of reasons: to make weeding easier, avoid bunny problems (not that we've really had a problem there), and hopefully alleviate our previous earwig problems (so far, so good)! Unfortunately they haven't stopped our biggest enemy: the squirrel. A perennial problem, this year they're just being malicious and contemptibly obnoxious — rather than an occasional bite out of a zucchini or cucumber, they're going straight to the stalk to take the plant down at it's source. And they seemed truly offended by our potato plants — those were completely and ruthlessly destroyed. And they stole our first (and so far only) tiny watermelon fruit! Jerks! So we've had to cover the gardens with netting, which makes harvesting and weeding tricky, and if the plants grow through the netting, it makes for a rather tangled mess... but at least our veggies don't get eaten.

I've been enjoying picking my daily greens: kale and lettuce salads with fresh dill and/or basil; kale for crackers; kale for smoothies... I find as long as you put in a frozen banana, a bit of maple syrup, an apple, or an orange for sweetness, you can get a lot of greens in a smoothie and still have it be quite palatable. And I generally prefer smoothies over juicing so I get all the fibre and none of the waste/cleanup. Some favourite combos of late:

And our grapes are going to be very prolific this year! Last year was the first time since Mark planted them four years earlier that we had any grapes, and we were thrilled to get the four bunches we did. This year there are too many bunches to count! Once they start to ripen and entice the birds, we'll have to net these too — though I do think we'll have enough to share this year!

Mark's mad carpentry skills strike again! :)


Dill, basil, kale, peas, YUM!

Look how many bunches of grapes! So exciting!

I find this intrepid bunch hilarious!

Wednesday, March 26, 2014

Homemade Chocolate Chip Cookie Dough Larabars

I cannot believe how good these taste, considering it's mostly just dates and cashews! It's another gem of a recipe from Oh She Glows: raw, vegan, and nutritous. I used the gram measurements for the cashews and dates, and 1 tsp of water, and they turned out great!


Homemade Chocolate Chip Cookie Dough Larabars
RECIPE BY ANGELA LIDDON OF OH SHE GLOWS
1.5 cups (230 grams) raw cashews
1/4 to 1/2 tsp fine grain sea salt
1 cup (190 grams) tightly packed pitted medjool or honey dates
1 tsp pure vanilla extract
3 tbsp dairy-free chocolate chips
  1. If your dates are stiff or dry, soak the dates in a bowl of water for 30-60 minutes before beginning. Drain well and pat dry before use.
  2. Add cashews and salt into a food processor and process the until the cashew crumbs are just smaller than peas.
  3. Now add in the pitted dates and process until the mixture comes together. The mixture should stick together easily when you squeeze it between your fingers. If it doesn’t stick or it’s still a bit crumbly, add a very small amount of water (1 tsp at a time) and process it again.
  4. Add the vanilla and process until combined. Finally, pulse in the chocolate.
  5. Line an 8-inch square pan with 2 pieces of parchment paper, one going each way (this makes it easier to lift out). Scoop mixture into pan and smooth out with hand until it’s level. Beginning at the centre, push down firmly all over the mixture. The more you pack it down the better the bars will hold together.
  6. Freeze for at least 15 minutes and then slice into 10-12 bars. The bars are a bit fragile and can break apart, so just handle them carefully. For on-the-go, wrap bars in parchment paper and store in the fridge or freezer. Or just store them all in an air-tight container if enjoying at home.

Friday, February 28, 2014

Holy smokes, I made bagels!


Ever since my friend Erin posted a recipe for bagels on her awesome blog, I have been wanting to make them. And here we are, two years later, and I finally did! (Not sure why or how it took me so long... er...)

Anyway, my goodness, they turned out so well! Incredibly delicious, and the house had that cozy bakery smell for hours! The recipe makes eight, and like Erin suggested, I'll definitely be making more than just one batch next time.

Thursday, October 10, 2013

Friendsgiving, local meat, and my 300th post!

Now the green conifers stand out in a sea of gold

And suddenly, it was fall. Full-on. Trees are aflame with vibrant colours, fluttering to the ground, painting trails with rusty gold. It seems that the trees were green just yesterday, with only a tinge of the colours to come, but now they're suddenly scarlet orange.

To celebrate this (sadly) brief, but oh-so-wonderful time of year, we had some good friends over for a potluck feast of epic proportions, but not before a lovely hike in Gatineau Park together to fully soak in the delicious colours and that unmistakable scent of fall — what is that? Is it the fallen leaves? The earth readying itself for its winter slumber? Anyway, it's an incredible smell, that makes you happy and content with each deep breath.

What's more glorious than walking through a sunny forest in Autumn?

Thursday, October 3, 2013

And we have grapes!

Since Mark planted the seed when we moved in four years ago, our little grape plant has grown and flourished (taking over the trellis and fence entirely, and starting to encroach upon the neighbouring tomatoes... ahem...), and this year for the very first time, it produced grapes. Four little bunches of beautiful concord grapes. Perfect little orbs of divine, juicy deliciousness. It's entirely true that things grown in your own yard taste so much better, isn't it?


Tuesday, September 24, 2013

Blueberry-basil-tahini smoothie


I find I'm eagerly awaiting my perfect yellow bananas to turn spotty and brown so I can throw them in the freezer in preparation for this incredibly tasty smoothie! Yay for brown bananas! And throughout the summer I used fresh basil, but now, with early frost setting in, my basil is nearly picked clean, so dried basil it is!

Blueberry-basil-tahini smoothie
Recipe by Sarah Britton, My New Roots

1 cup blueberries, fresh or frozen
1 frozen banana
5–7 large basil leaves (fresh is best, but I tried dried, and it was fine)
1 tbsp tahini
1–3 tsp bee pollen (depending on how often you use it)
2 tbsp hemp seeds
1 handful of greens (spinach and kale are good choices)
water or milk of choice to thin, as needed

1. Blend all ingredients in a blender or with an immersion blender until smooth and creamy. Enjoy immediately.

Wednesday, August 7, 2013

Crab-apple butter/sauce/jelly

We noticed a bough of the crab apple tree out front was hanging particularly low. We thought it was because it was just laden with so much fruit. But, turns out that branch is split and will have to be removed. (In fact the entire tree is looking a little weary, but we're hoping it will hang on for a few more years.) But the branch is still producing some luscious-looking apples, so at first we thought 'oh, we'll just pick that branch clean and then move on to the rest of the tree' and talked about getting out the ladder and so on. However, after picking a heaping bucket of beautiful, crimson orbs and turning that into 16 jars of delicious apple butter/sauce/jelly, and picking another heaping bucket and prepping them for the freezer, the branch seems no less laden, and we are out of jars and freezer space...


Tuesday, July 30, 2013

The ultimate chocolate + date raw energy bars

This has been (like most summers around here) an ultimate summer, with lots of weeknight ultimate frisbee games and weekend tournaments. A few weeks ago, Mark's team, Glide, competed at Regionals in Kingston for a spot at Nationals in Vancouver. Not only did they qualify (WOOT!), but they ranked 4th (of 15) at the end of the weekend. So Glide is west-bound again to compete at Nats! And for athleticism of this caliber, you need good fuel. Enter, homemade energy bars. Sure, you could buy them, but it's cheaper to make your own, plus it's nice to know exactly what's in them, and trust me, these are delicious!

(And at the most recent ultimate tournament, No Borders, Glide fought hard and placed 2nd overall! An awesome achievement!)


Chocolate & Date Raw Energy Bars
Recipe by Shumaila, The Novice Housewife

12 medjool dates, pitted
½ cup raw almonds
½ cup raw hazelnuts
2 tbsp chia seeds
¼ tsp sea salt
¼ cup raw cacao powder
¼ cup raw pumpkin seeds
¼ cup unsweetened dessicated coconut

  1. In a food processor, pulse the dates until well chopped and begin to form a ball.
  2. Add in the almonds and hazelnuts and pulse until finely chopped with some larger pieces remaining.
  3. Add the chia seeds, coconut, salt and cacao powder and process until well combined.
  4. Scrape mixture into medium bowl and, with damp hands, press into a ball.
  5. Turn ball out onto a piece of parchment paper, cover with a second piece of parchment, and press into a rough rectangle shape to desired thickness.
  6. Lift the parchment, sprinkle with sea salt, pumpkin seeds, cocoa nibs, or any other toppings you want. Give another quick roll with the rolling pin to press the toppings into place.
  7. Remove top piece of parchment and using a knife or pizza cutter, slice into pieces.
  8. Wrap with a rectangle of parchment and tape or tie to seal.


An on a (marginally) related note, here's the logo I designed this year for the team Mark and I play on, the Killer Bunnies! (You'll remember this is the very same team that were the champions of the 7th tier of the Tuesday Night League a couple of years back.)

Sunday, July 21, 2013

Ginger-cinnamon banana shake of goodness


This is a nutritious and scrumptious "recipe" I made up a few years ago, when I was trying to find another use for yet another brown banana that were beginning to stockpile in my freezer. It's great as a breakfast shake, and can be quite filling with the physillium. It's less of a recipe and more a list of ingredients, so add as much or as little as you like.

Ginger-cinnamon banana shake
BASE:
— frozen banana
milk (any milk would be good: soy, hemp, almond, or good ol' cow)
— freshly grated ginger
— cinnamon

OTHER ADDITIONAL INGREDIENTS:
— physillium husk fibre
— flax seed, ground
— ginseng, powdered
— chia seeds
— a sweetener such as: agave nectar, honey, or maple syrup
— lucuma (I first came across lucuma for this nut butter cup recipe)

DIRECTIONS:
1. In a blender or the cup of an immersion blender, add all the ingredients.
2. Blend.
3. Mmmmmm.

Monday, July 15, 2013

Homemade nut butter cups!


There truly aren't enough superlatives to describe this tasty delight. You may have noticed I'm a big fan of Sarah Britton's My New Roots food blog, and this is just another of her spectacular recipes. Plus, I was happy, elated that they ended up looking like they were supposed to. So pretty. Like little crowns of scrumptious tastiness. Mmmmmm.

It was difficult tracking down some of the less common ingredients like lucuma and cacao butter, and they weren't cheap, but these are delectable, once-in-a-while kind of treats. So perhaps don't make them for a potluck where they may not be appreciated beside the Doritos, but save them for a special occasion.

And, eat them straight from the fridge! If they sit out even for a minute, they start to get soft and hard to handle (or, delicious gooeyness, depending on your perspective).


Superfood Nut Butter Cups
Recipe by Sarah Britton of My New Roots

Makes 12 standard muffin cup-sized candies (I found these quite large however, so make minis if desired)

Basic Raw Chocolate
Makes about 1 ½ cups
1/2 cup melted coconut oil
3 tbsp. melted cacao butter
¾ cup raw cacao powder
1/3 cup raw honey
2 tbsp. lucuma
¼ tsp. sea salt
extra sea salt for garnish

Nut Butter Filling
1/2 cup almond butter
1 tbsp. raw honey
1 tbsp. lucuma powder
sea salt to taste

1. In a double boiler (or a glass bowl over a pot of simmering water) melt coconut oil and cacao butter. Add honey and whisk to combine. When completely uniform, remove from heat and sift in cacao, lucuma and add sea salt. Taste for sweetness and saltiness, and adjust accordingly.

2. In silicon or paper muffin cups spoon enough liquid chocolate to cover the bottom. Place in the fridge or freezer and cool until solid, about 15 minutes. Remember that you are only using about 1/3 of the chocolate at this stage.

3. Make the nut butter filling by combining all of the ingredients until a “dough” is formed. Add more lucuma if it is too wet and runny. Taste for salt. This dough should be quite salty, but if you are using store-bought nut butter with added salt, don’t go overboard.

4. Spoon the nut dough into ½ tablespoon amounts, roll into balls, and flatten between your palms to just under the size of the chocolate in the cups.

5. Add nut butter filling to each cup on top of the solid chocolate and drizzle the remaining liquid chocolate on top, making sure to cover the filling completely. Sprinkle with flaky sea salt if desired. Place in the fridge to harden for at least one hour.

6. When you have patiently waited, try removing one of the forms from the nut butter cups. If the chocolate sticks at all, return to the fridge until completely solid.

7. You can keep the chocolates in their forms or remove them, but either way store the nut butter cups in the fridge in a sealed container. Enjoy!

Monday, May 27, 2013

Dal Baht Power, 24 Hour

The best food to fuel strenuous stairclimbs and steep descents, is, without a doubt, dal baht. Proud of their national dish, porters and restaurant owners alike will repeat the refrain “dal baht power, 24 hour,” because it really does seem to last that long (especially with a second helping).

Served on a large, stainless steel platter, dal baht consists of a mound of white rice, surrounded by a few different kinds of curry, which vary slightly from village to village, but almost always includes a potato/onion/spinach curry, another cooked/curried vegetable, a spicy pickled condiment, a few slices of cucumber, and a papadum. And of course, a bottomless bowl of dal. In fact, most of the components are bottomless.

As if you need any other reason to choose dal baht, the Annapurna Conservation Area Project (ACAP) encourages trekkers to choose the same dish when ordering (rather than one person ordering a burger, and someone else ordering a pizza), because fuel is precious in the mountains. If it’s wood, it has to be cut down and carried to the village (and there isn’t much in the way of reforestation programs in Nepal), and if it’s gas, it has to be hauled up by humans or mules, often from great distances.

Furthermore, compared to some other dishes on the menu, all of the ingredients for dal baht are grown locally, possibly from the very village you’re in.

So there you have it: dal baht – a deliciously eco-friendly decision.


Nepalese, masterful (if not a bit cruel...) stair builders.
Down, down, down we go...

Wednesday, November 14, 2012

Lately

Fun, and relaxing, and rejuvenating weekend visits from friends and fam. And inevitable "goodbyes" at the end of the weekends... Emotional times over here!

A pre-Halloween hike to the Carbide Wilson ruins in Gatineau Park.


Cousins!


The Crepe Feast to end all Crepe Feasts.

A Remembrance Day meander around Parliament.

Monday, October 15, 2012

Accidental pumpkin farmers

So it did turn out to be an interesting, and most definitely fruitful, mystery! The pumpkin empire yielded some plentiful spoils indeed: after the frost killed the plant, we harvested, and found eighteen pumpkins. Eighteen! Plus the three or four green ones we harvested early on brings the full harvest to about twenty-two. Amazing!


After some reading, it sounds like the light and warmth from the sun is what turns them orange. And judging from the green one that has been sitting on the sunny kitchen counter for the last few weeks, that seems to be true. The half that has been facing the sun is now orange!


So hopefully after sitting in the warm, sunny kitchen, we'll have some wee jack-o-lanterns! If not, they will make delicious pie. Actually, I know they make delicious pie: I just made my first from-scratch pumpkin pie ever, and it was pure deliciousness. Oh how I love harvest time.

Friday, September 14, 2012

What to do with mammoth zucchini.

That's actually a question. Seriously, what am I supposed to do with these beasts; these tasty, beautiful, beasty spoils we found hiding in the "squash" plant?


I've made zucchini pancakes, zucchini pasta, grilled zucchini, moussaka (sooo good, but sooo time consuming...), quiche, piles and piles of muffins, and I'm even trying to ferment a jar's worth. We'll see how that goes. And there's still plenty of zucchinis to give to the neighbours. Anyway, if you've got some great uses for zucchini, I would love to hear about them.

Monday, September 10, 2012

Ok, I know I've wavered back and forth on this, but the mystery plant is most definitely pumpkin!

It's now abundantly clear that the mystery plant that came up on it's own, is not squash, but pumpkin. After the last post about how it's taking over the yard, Mark bravely ventured into the thick of the monster's depths, and found a bounty hiding. Three mammoth zucchinis (from the zucchini plant somehow not being smothered, but coexisting nicely with the pumpkin), and three fat, green pumpkins — there's no way acorn squash could be that big or round!

And since then, each arm of the pumpkin plant has shot further and further across the lawn, and each has a pumpkin or two growing on it, for a total of twelve! With more popping up each day! Rather than harvest any more before they're ripe (green pumpkins can be prepared and eaten in the same way as summer squash), we're going to wait until they turn orange, and then invite the neighbours over to pick their own, because a girl can only make so much pumpkin pie, and roasted pumpkin, and pumpkin seeds, etc.

I'm giddy that I have a pumpkin patch, and at the thought of looking out the window someday soon after a frosty night, and seeing orange pumpkins in my yard!


Monday, July 23, 2012

Parallel Botany: Kohlrabi


Straight from outer space, and into my belly, this alien vegetable is a new one for me. But this is yet another joy of being part of a CSA share: being exposed to new and wonderful vegetables. Just when you thought you knew them all, kohlrabi drops like a meteor into your veggie-loving heart.

Tastes a bit like a cross between a broccoli stem, turnip, and radish. In other words: unique. To prepare, pull off the leaves (juice 'em!), and peel the remaining 'bulb' (the outside is quite woody). From here you have a lot of options. Basically, anything you would do with a potato, you can do with kohlrabi.

I chopped it and made a tinfoil packet for the BBQ. It looked a little plain and colourless on it's own, so I added some striped beets and scape, tossed it with olive oil, and salt + pepper. Delish!


Thursday, July 5, 2012

Juicing

Juicing has been a great way of using the extra greens from the CSA shares. In fact, it's a great way of using any and all fruits and veggies that are a bit too mealy, wilty, or limp to eat on their own. I'd never juiced before, but a friend gave me her old juicer that she wasn't using anymore, and it's awesome! It does a phenomenal job of extracting the juice, so I'm left with only very dry, fibrous pulp, which I am saving in the freezer to add to soups and muffins. Anyone have any other uses for the pulp?


Wednesday, July 4, 2012

CSA sharing Wednesdays


I enjoyed reading Shanna's funny post about how having a CSA share is like—but really not at all like—being a parent. Not that I would know, but I did feel some weighty responsibility when I picked up last week's share, which included a massive head of napa cabbage. It filled my bike basket entirely. After we split it with our CSA share sharing buddies, it was a much more manageable size, but even still, it's been napa cabbage salad every day over here.


I can also relate to the pressure to do something interesting and creative with the spoils. I tried to make this lovely chard and onion galette, but it was an epic, epic failure. Firstly, my dough didn't bind... entirely possible because I used mystery flour instead of white flour (I'm trying to use it up!), and coconut oil instead of butter (but it says 'use like butter'!)... in any case, I ended up with a non-doughy, but still tasty, crumbly, cracker-like base, on which I piled the sauteed chard and onion, since there was zero hope of this "cracker" wrapping around anything... It was not good, people. Not good. Mark powered through it like a trooper; just took a few glasses of milk to help wash it down... 


Random aside about my bike basket:
The basket was kicking around the house, and I needed something to help carry home the CSA bounty. So Mark attached it to my bike, and it is the *new awesome.* I mean, my paniers are great, but they've got nothing on this basket. However, I am under strict orders not to fill it with kittens. Hrmph. Other than carrying CSA bounty, what good is a bike basket if you can't fill it with kittens?!

Tuesday, July 3, 2012

It's taking over


And we're not sure what it is. At first we thought zucchini, but it's too big for that now. Doesn't quite look like squash either. Our best guess is pumpkin, which is funny, because we didn't plant pumpkin. Possibly a rogue seed from our compost soil, which would be remarkable, because of the one pumpkin we had at Halloween, I roasted all but a handful of the seeds. It also means the compost we spread on the garden hadn't composted enough. An interesting (and hopefully fruitful) mystery...

Thursday, April 19, 2012

Raw brownies and kale chips


How about sweets first, then the salty. My friend SV made a batch of these brownies when I was over for one of our feasting marathons, and I was hooked. They are unbelievably scrumptious, but may cause a food processor burnout. Mine nearly ground to a halt trying to blend up the sticky sticky dates, but any struggle is well worth it.

The Raw Brownie
Recipe from My New Roots

2 cups whole walnuts
2.5 cups dates
1 cup raw cacao
1 cup raw unsalted almonds, roughly chopped
¼ tsp sea salt

1. Place walnuts in food processor and blend on high until the nuts are finely ground.
2. Add the cacao and salt. Pulse to combine.
3. Add the dates one at a time through the feed tube of the food processor while it is running. What you should end up with is a mix that appears rather like cake crumbs, but that when pressed, will easily stick together (if the mixture does not hold together well, add more dates).
4. In a large bowl (or the pan you plan on putting the brownies in), combine the walnut-cacao mix with the chopped almonds. Press into a lined cake pan or mold. Place in freezer or fridge until ready to serve (it is also easier to cut these when they are very cold). Store in an airtight container.


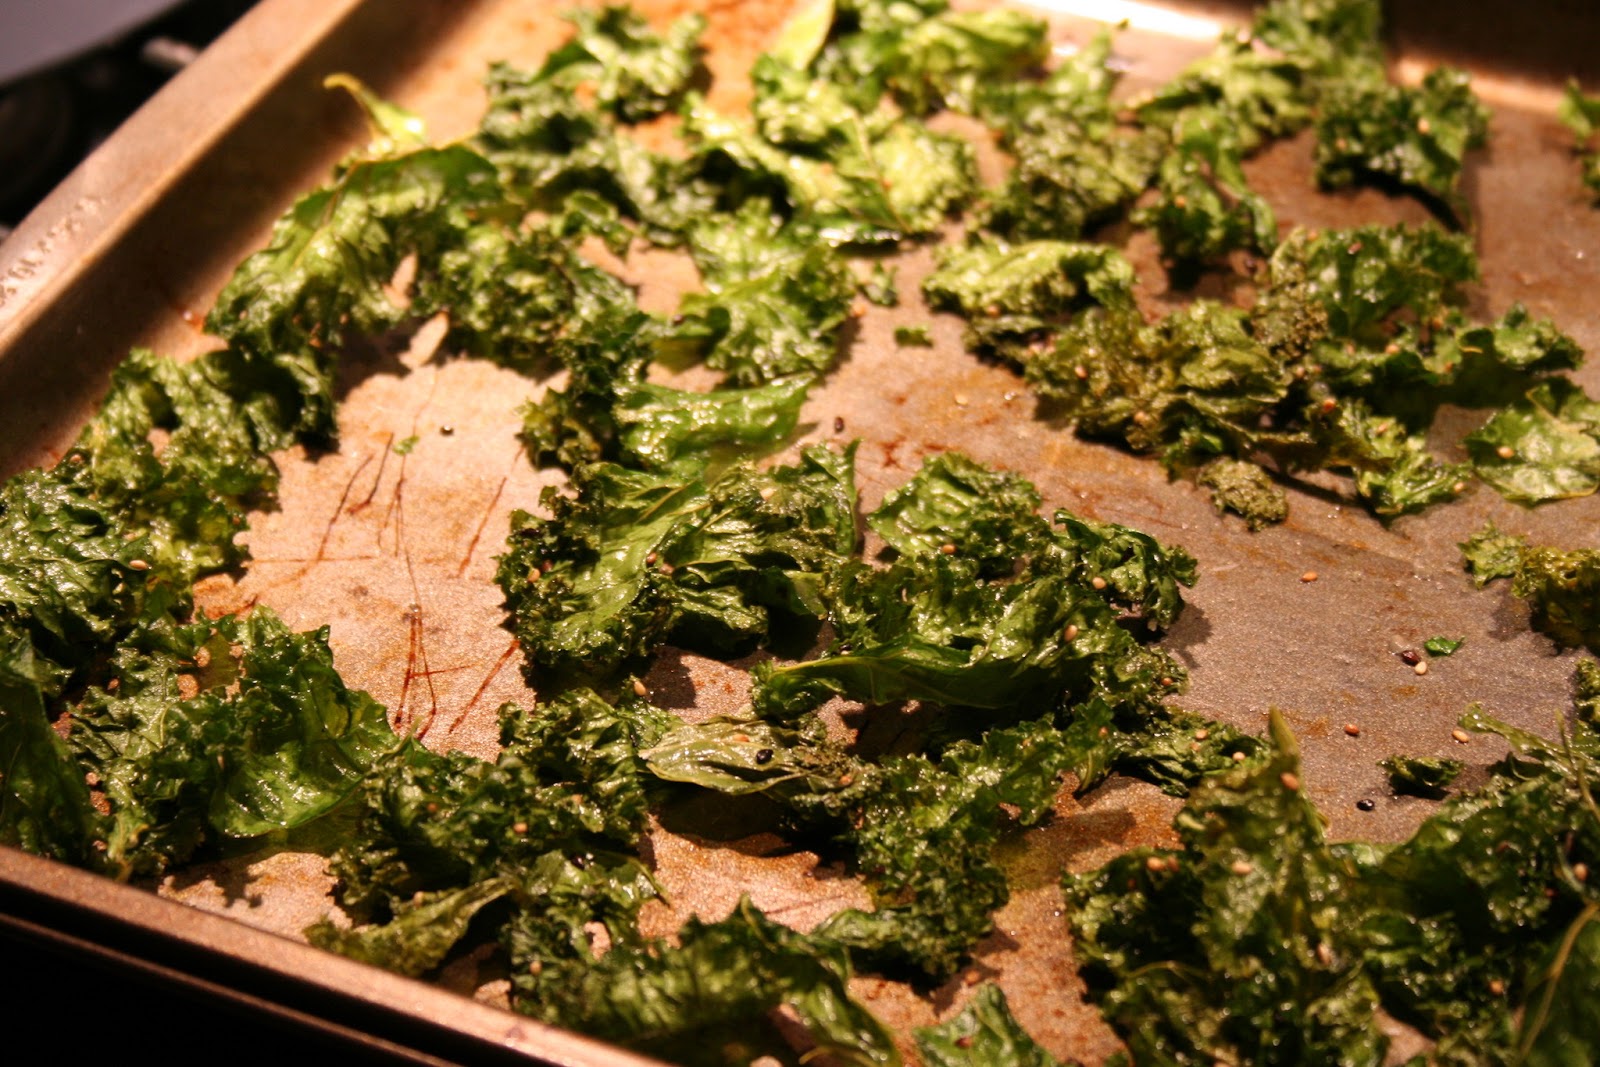
I am loving all the amazing recipes featuring kale lately (Adrienneats has posted a lot of awesome ones, this one's one of my favourites). Salads I get, but chips? From kale? Really? I was so curious to try them. And when I finally did, I can see why they're so popular! I would describe their texture as crispy, but too delicate to call crunchy. Because they're so crumbly, like a dry autumn leaf, I imagine storing them in a jar is best, but mine never made it past the cookie sheet...

Kale Chips
Recipe adapted Feather + Anchor

Curly kale
Olive oil
Sea salt
*Other optional toppings: soy sauce, sesame seeds, cayenne pepper, ground pepper etc.

1. Tear kale into small pieces and drizzle with oil, salt, and any other toppings you wish, and toss until coated. As Erin mentions, keep the oil/liquids to a minimum (I made a batch with too much soy sauce, and they took a lot longer to dry out) and place on a cookie sheet in a single layer without overlapping edges.
2. Bake in a 200ยบ oven for 20 to 30 minutes, or until the kale is dry and crispy. 
3. Feast.