Sunday, April 27, 2014

Chickadee stuffies — now in the shop!

Just added to the shop: chickadee stuffies! Whether you want an extra chickadee to live in your Chickadee House, a new little friend to carry around in your pocket, or just a toy for your favourite feline to bat around (that won't harm any actual chickadees...), I've got chickadee stuffies for all!

In the last blog post I shared a little bit about my process, and today I thought I'd illustrate the entire process in pictures, from sketch, to finished stuffie.

It begins with a sketch...

Then that sketch is traced, and the trace is scanned...

And then I paint (digitally), layers of texture and colour...

I upload my final files to Spoonflower, and they arrive a few weeks later, printed on fabric!
I sew them together, and add them to the shop!

Thursday, April 24, 2014

Behind the scenes: a sneak peek at my process

A lot of what I make is directly tangible from the outset — the Wee Fabric Houses that I make from upcycled thrifted fabrics come together physically, piece at a time. On the other hand, the houses and puppets that I make from fabric custom-printed with my illustrations have quite a lengthy process behind them before there's anything physical.

I've been working away on some new house and puppet designs, but since it will be about a month before my latest fabric order arrives, I thought I'd share a bit about my process, and give you some sneak peeks on what's coming!

When I have an idea for a new project, I begin doing some preparatory sketches, and then move toward refining those drawings. Each piece for each puppet or house is drawn separately using template pieces that I created for myself, but if I've got a new house shape in mind, then I create a new pattern to work from. For instance, my Japanese Teahouse and Chickadee House use the same pattern (except of course for the hole/door in the side of the birdhouse!), but for my Gingerbread House, I changed the width of the house and the pitch of the roof, to suit what I was trying to achieve.

After I'm happy with my pencil drawings, I trace them with a marker-like pen, which gives me a looser, more expressive quality of linework. I then scan these tracings, and begin the process of colouring on the computer. Through a series of layers with various digital brushes, I build up tone and texture, often reworking areas repeatedly until I'm happy with how it's coming together. Each new house takes about a week and a half to finish illustrating, and each puppet about 4 days.

I then prepare my files for uploading to Spoonflower, fitting my pattern pieces as efficiently as possible (like Tetris pieces!) into the 42" by 36" yard dimensions. After submitting my order, I *patiently* wait the 3-4 weeks for my fabric order to arrive, then cut out all the pieces and sew them together into happy little puppets and houses, and voila!

Sketch for one of the sidewalls for a new Wee Fabric House: The Gnome Home!

Each Gnome Home will come with a wee Gnome stuffie.

Gnome after he's been digitally painted.

Sketch for the head of a new puppet: a raccoon!

Preparatory sketch for a new fox puppet. 
Finished cover for my new fox puppet kit (yes, kits!)

Sketches for a new Wee Fabric House: a barn, complete with farm animal finger puppets.

Some of the final pieces for the barn, laid out for printing.

Wednesday, April 23, 2014

Rolling Hills Studio Tour — Mother's Day Weekend

If you happen to be in the Toronto / Peterborough / Lindsay / Port Perry area this Mother's Day weekend—May 10 and 11—be sure to head over to beautiful Bethany, for the annual Rolling Hills Studio Tour. I will be participating this year as a guest artist at Williams Design Studio (at Studio "A" on the map). Bethany is about an hour and 15 minutes north-east of Toronto, 20 minutes east of Port Perry, 20 minutes west of Peterborough, 20 minutes south of Lindsay, and about 40 minutes north of Cobourg. Here is a link to the full brochure. Hope to see you there!


Tuesday, April 22, 2014

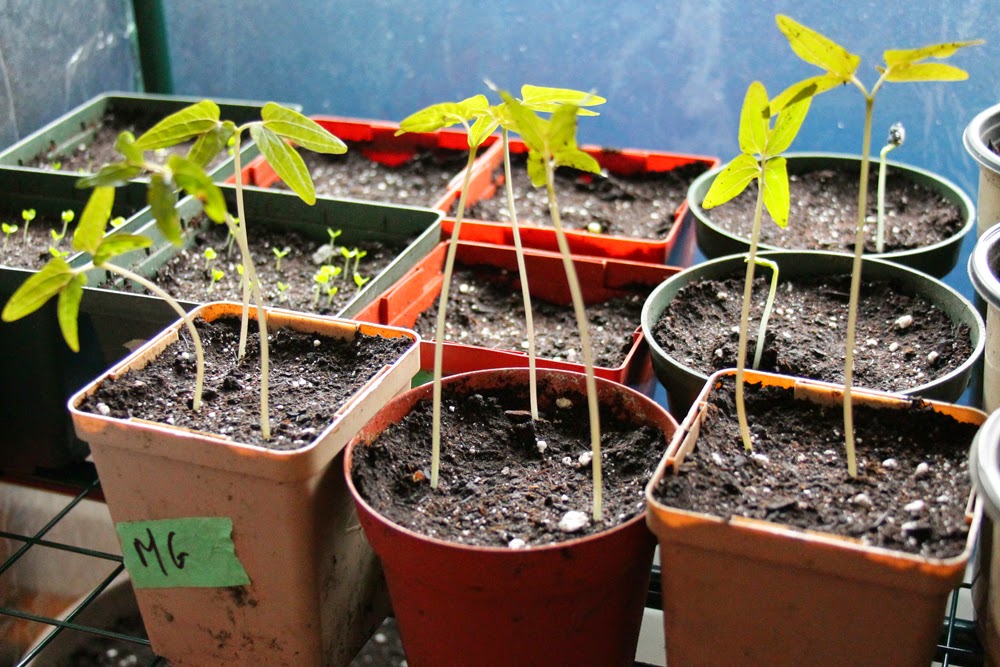
A seedling update for Earth Day!


Last Sunday Mark and I planted some vegetable, herb, fruit (watermelon!), and flower seeds, with high hopes of a fruitful (or veggie-ful?) garden this year. And just a week later, so many of the seedlings have shot up and seem to be quite happy in our little portable green house. Well the vegetables and herbs anyway, and the very eager morning glories, but no sign of the ranunculus yet... hopefully soon!

Happy Earth Day, everyone!


Thursday, April 17, 2014

Baby quilt progress


Well that didn't take very long! My goodness, machine quilting is where it's at! Not sure why I took on a mammoth hand-pieced quilt for my first quilting endeavour, but I am very glad I took a short hiatus to work on this small quilt for the baby. I could have a row sewn together and attached to the main block in half an hour. Half an hour! A row on my queen-sized hex quilt takes many half hour sessions... it's hard to say exactly, but if I were to work constantly on it, probably two days. I know, I know, it's the journey, but sometimes (just sometimes) with my hexie quilt I find myself asking "are we there yet?" Suffice it to say, it was very rewarding for my progress-oriented mind to have the piecing come together so quickly.

Now on to the quilting, then the binding (which is my favourite part, I really do love hand-stitching after all...) I'm thinking a solid goldenrod yellow for the backing, to pick up the honey hues on the front, and to highlight the line work of the quilting stitches.

Can't wait to swaddle up the Little Mr. in this quilt!

Wednesday, April 16, 2014

Relegated to the shadows


We've lost so much snow in the last week. A couple of mild days and some rain have taken care of most of it, and relegated the dregs to those cold, shadowy spots where the sun doesn't quite reach. Or at least that's how it was until yesterday, when the temperature dropped sharply, turning the spring rain into a most unwelcome spring snow.

On Monday temperatures miraculously, gloriously soared into the mid-twenties! Windows were flung wide, laundry was hung on the line, life was good. Less than 24 hours later, we plummeted over a huge 40 degree precipice to minus 15. If we hadn't already had six months of this, this brief lapse into winter might not be so bad...

But! There are little shoots of daffodils and crocuses beginning to bravely peek above the soil. The pussy willows are popping. And I have seen a single robin. I know it's coming, but I'm finding I have to dig so very deep into the dregs of my patience to weather what I truly, truly hope is the very last of this Unending Winter...

At the beginning of April, there were a few days where it was just mild enough,
and the deck was snow-free so that Mark could start work on the harvest table.

The last of the snow before the snow came yet again.

Signs of life!

One of the few indicators I have that spring is coming.
Grow, brave little shoots, grow!

Wednesday, March 26, 2014

Homemade Chocolate Chip Cookie Dough Larabars

I cannot believe how good these taste, considering it's mostly just dates and cashews! It's another gem of a recipe from Oh She Glows: raw, vegan, and nutritous. I used the gram measurements for the cashews and dates, and 1 tsp of water, and they turned out great!


Homemade Chocolate Chip Cookie Dough Larabars
RECIPE BY ANGELA LIDDON OF OH SHE GLOWS
1.5 cups (230 grams) raw cashews
1/4 to 1/2 tsp fine grain sea salt
1 cup (190 grams) tightly packed pitted medjool or honey dates
1 tsp pure vanilla extract
3 tbsp dairy-free chocolate chips
  1. If your dates are stiff or dry, soak the dates in a bowl of water for 30-60 minutes before beginning. Drain well and pat dry before use.
  2. Add cashews and salt into a food processor and process the until the cashew crumbs are just smaller than peas.
  3. Now add in the pitted dates and process until the mixture comes together. The mixture should stick together easily when you squeeze it between your fingers. If it doesn’t stick or it’s still a bit crumbly, add a very small amount of water (1 tsp at a time) and process it again.
  4. Add the vanilla and process until combined. Finally, pulse in the chocolate.
  5. Line an 8-inch square pan with 2 pieces of parchment paper, one going each way (this makes it easier to lift out). Scoop mixture into pan and smooth out with hand until it’s level. Beginning at the centre, push down firmly all over the mixture. The more you pack it down the better the bars will hold together.
  6. Freeze for at least 15 minutes and then slice into 10-12 bars. The bars are a bit fragile and can break apart, so just handle them carefully. For on-the-go, wrap bars in parchment paper and store in the fridge or freezer. Or just store them all in an air-tight container if enjoying at home.